Quick start
This is quick start guide to help you how to publish your first dataset on Lizmap with a few knowledge.
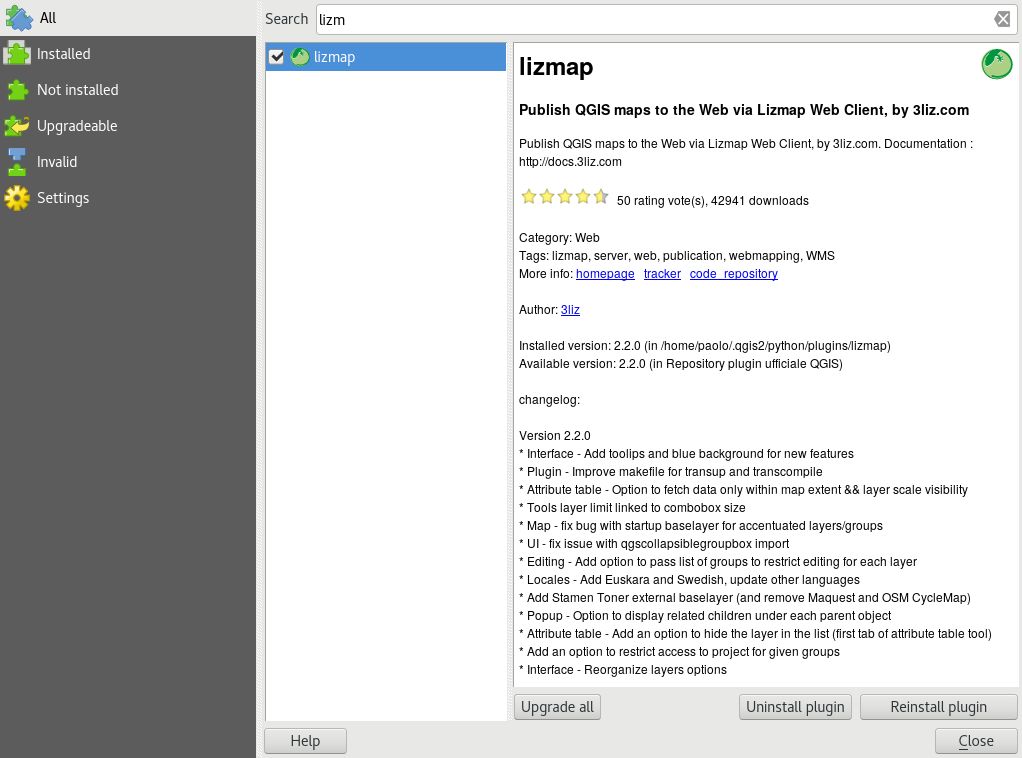
Installing the Lizmap plugin on QGIS Desktop
To publish a QGIS project in Lizmap Web Client, you need a Lizmap configuration file, with the extension .qgs.cfg.
This file is automatically generated by the Lizmap plugin in QGIS Desktop.
Search
LizmapClick on the plugin
Click on the button Install
It’s available in the menu and toolbar
Click the Lizmap
 button
Follow the wizard for adding your first server
Preparing your file organization
Lizmap Web Client must have the same files and directories architecture on the server than on your local computer.
Tip
It’s important to keep in mind that QGIS server will open your project with the same file paths as on your QGIS desktop. All your data must be within a folder which can be transferred.
Tip
custom_repository is a folder representing a common theme. The folder will contain one or many QGIS projects,
belonging to this theme. The name of the theme displayed on the web interface will be configured later.
You should use a machine name.
You are free to rename this folder with a different name, representing your own theme.
In this folder, we will store all projects related to Urbanisme and land-use during this tutorial.
We are going to create a folder structure on to make it easy to transfer on the server later:
On your computer, create a local
lizmapfolderCreate in the
lizmapfolder amediafolderCreate in the
lizmapfolder acustom_repositoryfolderCreate in the
lizmap/custom_repositoryfolder amediafolderCreate in the
lizmap/custom_repositoryfolder adatafolderCopy in the folder
lizmap/custom_repository/datathe geographic data to publish (FlatGeoBuf, GeoJSON, SHP, others files)
You should have this tree structure on your computer:
lizmap/
+- media/
+- custom_repository/
   +- media/
   +- data/
      +- geo-data.fgb
      +- your-geo-data.shp
      +- your-geo-data.shx
      +- your-geo-data.dbf
      +- your-geo-data.prj
Tip
You can change names of these directories except for media, which is a special keyword for Lizmap.
Read later the chapter about Media.
Preparing your QGIS project
In QGIS desktop, load data from the folder
lizmap/custom_repository/dataSave the QGIS project in
lizmap/custom_repositorywith the.qgsextension. For instancemy-first-lizmap.qgs.Prepare the data rendering:
layer order
groups in the legend
symbology
labels, etc
In , fill some metadata :
Title, the main title which will be displayed in the landing page. Use a human title with space and accents.
Abstract, a fully written paragraph for the description. HTML is supported.
Keywords, some keywords separated by a comma. This will be used by the search bar.
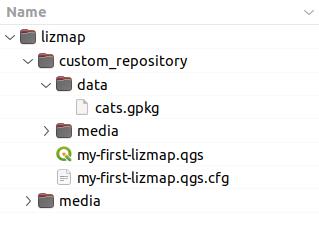
You should have this tree structure on your computer:
lizmap/
+- media/
+- custom_repository/
   +- media/
   +- data/
      +- your-geo-data.shp
      +- your-geo-data.shx
      +- your-geo-data.dbf
      +- your-geo-data.prj
      +- other-geo-data.fgb
   +- my-first-lizmap.qgs
   +- my-first-lizmap.qgs.cfg
Generate the Lizmap configuration file
Click the Lizmap
buttonClick on the Layers tab
For each layer:
Set a custom human title for your layer, which will be display in the legend
Be default, layers are published but not visible in Lizmap Web Client when we open the project online. Click on Toggled to make the layer visible by default.
Click on Ok
Next to my-first-lizmap.qgs, you must find now a new file my-first-lizmap.qgs.cfg.
Upload your files to your Lizmap server
When your map is ready, you need to upload all files and folder to the server.
Tip
With the help of your system administrator or the Lizmap provider, you must check:
how to transfer files on the server
the folder on the server used for hosting Lizmap repositories
Example of an instance hosted on Lizmap Cloud ![]() , you should have this tree structure on the server,
into the
, you should have this tree structure on the server,
into the qgis folder:
cog/
qgis/
+- media/
+- custom_repository/
   +- media/
   +- data/
      +- your-geo-data.shp
      +- your-geo-data.shx
      +- your-geo-data.dbf
      +- your-geo-data.prj
      +- other-geo-data.fgb
   +- my-first-lizmap.qgs
   +- my-first-lizmap.qgs.cfg
web/
Enable your folder to be a published repository
Be default, the newly created folder custom_repository located on the server in not publicly published on
the Lizmap landing page.
You must enable the remote folder, to be recognised as a Lizmap repository.
Go the administration interface of Lizmap in your web browser
Click on Map Management and then click on Create repository
Fill in the form:
Fill the Local folder path with the
custom_repositorypath.Either it can be a dropdown menu if a root repository is configured by the administrator (recommended solution)
Or it can be a text input. You need to fill a absolute path to the folder
Update the Label with the name to be displayed on the landing page, for instance
Urbanisme and land-use, accents and space recommended.Update the ID, it’s an internal ID for Lizmap. It’s mainly visible in the URL of the project. This identifier can not be edited later.
Click on all the permission boxes you want to change. For beginners, we suggest you to let the ones checked by default.
Click on Save
Your folder custom_repository should be now recognised as a valid Lizmap repository.
Visit your landing page and you should see your project and you can now display the QGIS project online.
Well done.
Tip
The folder custom_repository can contain as many as you want QGIS project files with their corresponding
.qgs.cfg file. All projects will be listed horizontally on the landing page.
Tip
If you create another folder next to custom_repository, like forestry with a published name
Forestry, your folder will be listed vertically.
Tip
In your administration page, visit the QGIS projects page to have an overview of all your Lizmap repositories and metadata about QGIS projects.
Going further
This the end of the quick start guide, we encourage you reading deeper the documentation about other topics, such as:
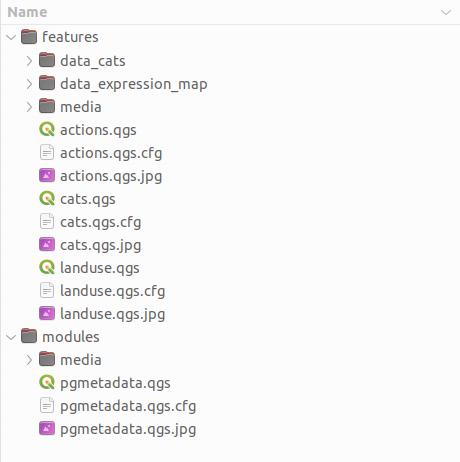
Example of Lizmap repositories
To understand how projects are listed vertically and horizontally, let’s have a look to the demo website.
If you look carefully, we can see there are some Lizmap repositories such as :
Features containing for instance :
Cats :
cats.qgsandcats.qgs.cfgLanduse :
landuse.qgsandlanduse.qgs.cfgAction and SQL :
action.qgsandaction.qgs.cfg…
Modules :
PgMetadata
PgRouting
It’s important to note that a Lizmap repository can contain one or many QGS files.
QGIS projects are displayed horizontally within a same folder.
Folders are displayed vertically on the landing page.