Filtered layer by user
Principle
Usually, the management of projects Lizmap access rights is via directory. Configuration is done in this case in the Lizmap Web Client administration interface. See Define the rights for each group. This will completely hide some projects based on user groups, but requires a directory and project management.
Instead, the filtering feature presented here allows you to publish a single project QGIS, and filter the data displayed on the map based on the logged in user. It is possible to filter only vector layers because Lizmap uses a column in the attribute table.
Filtering currently uses the ID of the user group connected to the Web application. He is active for all requests to the QGIS server, and thus concerns:
the vector layers images displayed on the map
the popups. See Popup
the Locate by layer feature lists. See Locate by layer
drop-down lists of Editing forms from Value relation. See Edition
upcoming features (the attribute table display, search features, etc.)
Example
A video tutorial is available at: https://vimeo.com/83966790
Configuring the tool
To use data filtering tool in Lizmap Web Client, you must:
use QGIS 2 on the server
have access to the administration interface of Lizmap Web Client
Here are the detailed steps to configure this feature:
Warning
In Lizmap Web Client administration, in the repository properties, be sure that anonymous and other relevant groups are not checked
for Always see complete layers data, even if filtered by login. See Define the rights for each group.
Check group ID or user ID in the administration interface:
To know group ID, you must go to the administration interface : ID appears in parentheses after the name of each group (under the title Groups of new users)
Or to know the user ID, just use its login.
For all vector layers which is desired filter data, just add a text column that will hold the ID for each line who has the right to display this feature.
Fill this column for each line of the attribute table with the ID (using the calculator, for example).
It is possible to set
allas the value in some lines to disable the filter: All users will see the data for these lines.If the value in this column for a row does not correspond to a user group, then the data will be displayed for no user.
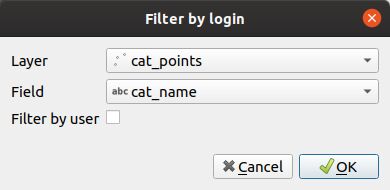
Add the layer in the table Filter Data by User panel:
Click the
 button.
Select layer from the dropdown list
Select the field with the ID
Check the box if the field contains user ID, instead of group ID
To edit a layer in the table, select it and click the
 button or double click on the row.
To remove a layer from the table, select it and click the
 button.
Warning
Disable the client cache and cache server for all filtered layers. Otherwise, the data displayed will not be updated between each connection or user logout!
Edition
If you have enabled the edition (see Edition) on the filtered layer, the field containing the ID will be editable with:
either a combobox for a non admin user with either his own login or
allor a line edit to write a value for a admin user