Printing
Extent defined by the user on the fly in Lizmap
To add print capabilities in the online map, you have to create at least one print layout without atlas enabled. Then you will find the list of your layouts in the Layouts plugin tab. They are enabled by default but you can disable it or set permissions for groups.
Note
Printing will respect the feature filters and selections.
Creating the layout
In your layout, you can add :
A map, without an atlas enabled
An image to North arrow
An image for the logo of your organization
A legend that will be fixed for all printing
Labels
- A scale
Either Numeric
Or set Fit segment width with a correct reference anchor point to adjust the position of the scale bar
A location map, a map for which you have enabled and configured one Overview
Since QGIS 3, you can use QGIS expressions, in your labels for instance. You can create automatic source label according to visible layers following this example on the QGIS documentation.
Dynamic content
You can allow the user to modify the contents of certain labels (title, description, comment, etc). To do this, you need to add an identifier to your label in the layout.
Warning
Each identifier must be unique for the whole layout. Identifiers must be strings, without integers or spaces
(e.g. it must be custom_title, nor 1 neither custom title).
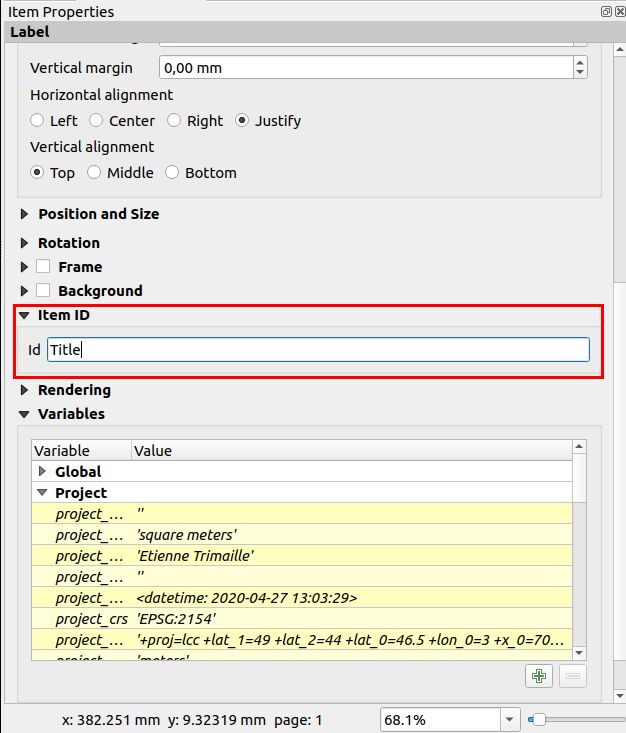
Lizmap will automatically ask the user in the web-browser to fill each fields.
Tip
If your label is pre-populated in QGIS, the field will be pre-populated too in the web-browser.
If you check ‘Render as HTML’ for your label in QGIS, you will have a multiline label in Lizmap accepting HTML code. But you will need to
<br>for line breaks.
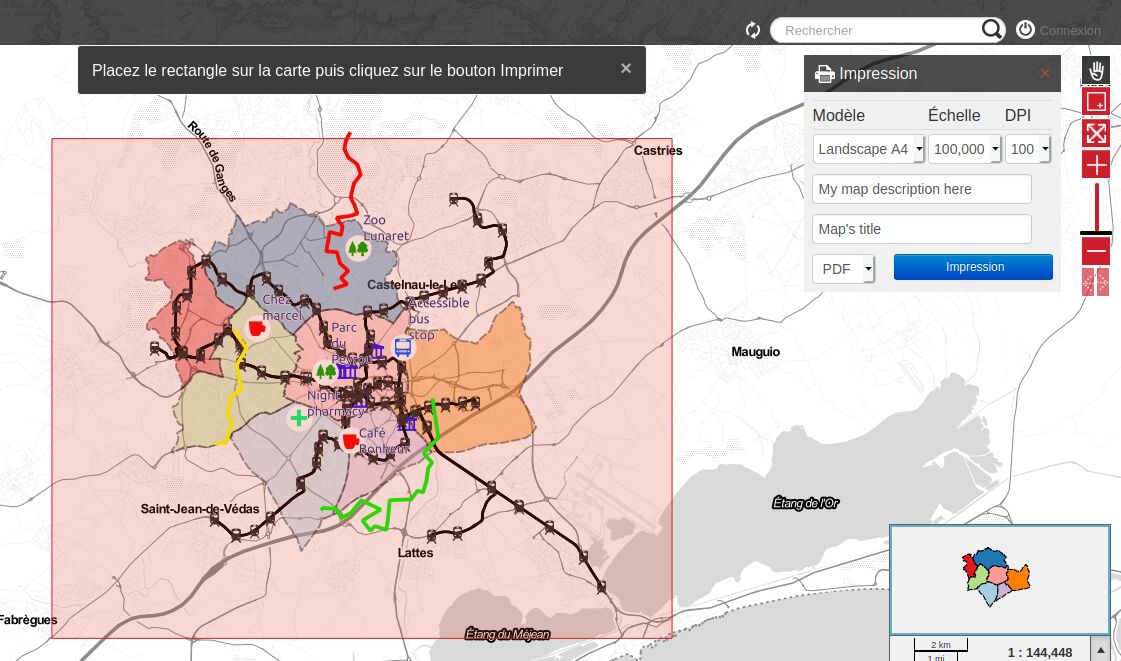
The preview in Lizmap will be similar to this screenshot. The light rectangle is the area the user can define in the web browser. The user can also set the map description and title.
Scales
The print function will be based on the map scales that you set in the plugin Map (Map options — The general options of the map).
Overview
You can create a location map by creating a second map for which you create an overview with the first map as the Map frame.
QGIS documentation
Layout with an atlas when using a popup
Read in the popup chapter, Link to a PDF layout using the QGIS Atlas
Adding your own images in a layout
If you add some custom images in a layout, such as custom North arrow or your organization logo, the server needs to access these images too.
First, try with an relative path to your QGIS project (QGIS Desktop shows an absolute path, but saves a relative path if you check the QGS file manually). Do not forget to send your tree structure on the server. This works on most of QGIS Server versions nowadays.
Either use an image with an URL
http://so that your image is accessible on both your local computer and on the server. Be careful to network latency.Or use QGIS expression to build a compatible path on both desktop and server (it should work out of the box, but in case it’s not working, you can use an expression.) :
Put your images in the
mediadirectory (see Media), this is not mandatory, you can put it next to your project file.Use an QGIS expression
@project_home || '/media/organization_logo.png'.Use slash even if you are on Windows.