Popup
Activate popup
With the plugin, you can activate popups for a layer or for a group configured with the Group as layer option.
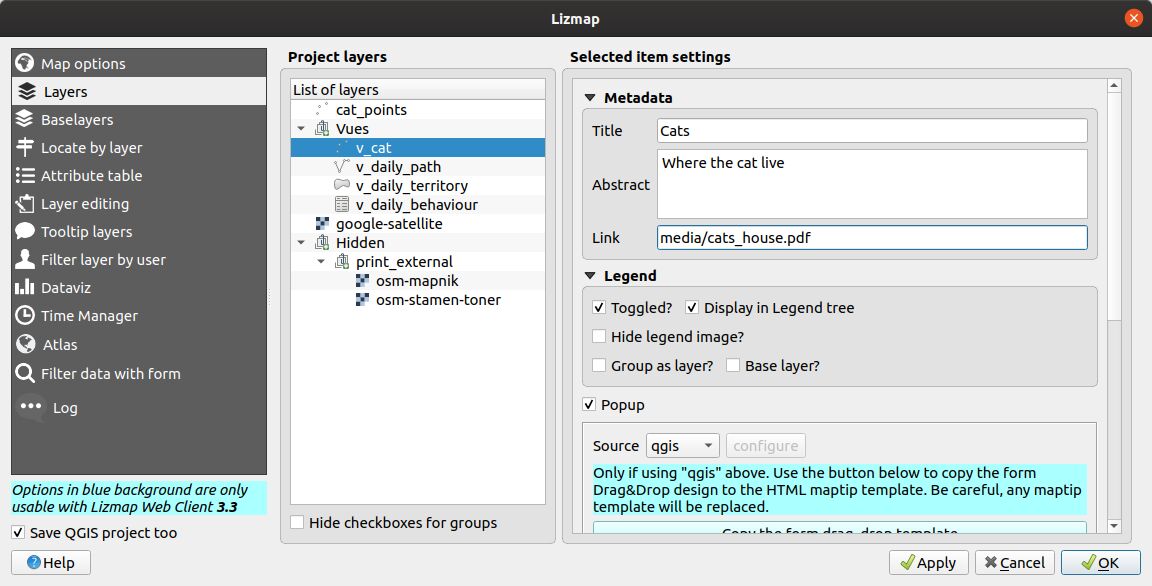
In the Layers tab, click on the Popup checkbox.

For the Group as layer option you must select the option for the group and for all the layers included you want to show in the popup: in this case, only the layers with the option Popup checked will be shown.
You have three types of popup sources:
auto, read Auto popuplizmap, read Lizmap popupqgis, read QGIS popupform, read Form popup
In the web application Lizmap Web Client, a click on a feature will trigger the popup if (and only if):
the popup has been activated
through the plugin for the layer or the group
or the layer has edition capabilities for existing features
the layer is active in the legend, so that it is shown on the canvas
the user has clicked on an area of the canvas where data for the layer with active popups are displayed.
Muista
For point layers you need to click in the middle of the point to display the popup. The tolerance can be setup in .
You can update where the popup is displayed in the web interface in . You can choose between:
dockminidockmapbottomdockright-dock
Media in popup
See Use in popups in the media chapter.
Auto popup
The Lizmap Web Client auto popup displays a table showing the columns of the attribute table in two columns Field and Value, as shown below:
Field |
Value |
|---|---|
id |
1 |
name |
A name |
description |
This object … |
photo |
:-) |
You can modify the info displayed through QGIS, and also display pictures or links.
Simple popup configuration
With the plugin, if you click on the checkbox Activate popups without modifying its content through the button Configure the default table is shown.
Nevertheless, you can tune several things in QGIS and with the help of Lizmap plugin to parametrize the fields displayed, rename fields, and even display images, photos, or links to internal or external documents.
Mask or rename a column
Varoitus
This is working only using Lizmap or Auto popup. The QGIS popup follows the QGIS maptip.
You need to use the tab in QGIS:
to hide a column in the popup, uncheck the corresponding WMS checkbox. The WMS column is on the right of the table. This will hide the field in QGIS Server from any WMS requests.
to rename a column, you should use the alias column. But to edit this column, add it from the tab .

Usage of media: images, documents, etc.
If you want to use some media in your popup (pictures, PDF documents…) in your popup, you must use the Media directory.
For a given feature, using a path in your field starting by media/, Lizmap will display:
the image itself for jpeg or png files
the content for txt or HTML files
a link to any other file extension
Katso myös
Chapter Media for more details on the usage of documents of the directory media in the popups.
Usage of external links
You can also use, in a field, full web links to a specific page or image:
the image referred to will be displayed, instead of the links
the web link will be displayed and clickable
Lizmap popup
Johdanto
If the simple table display does not suit your needs, you can write a popup template. To do so, you should know some HTML format. See e.g.: https://www.w3schools.com/html/
Varoitus
When you use the lizmap mode, the previous configuration to rename a field does not work anymore: you have to configure what is displayed and how through the template. Managing media is also possible, but you have to configure it as well.
Deploying
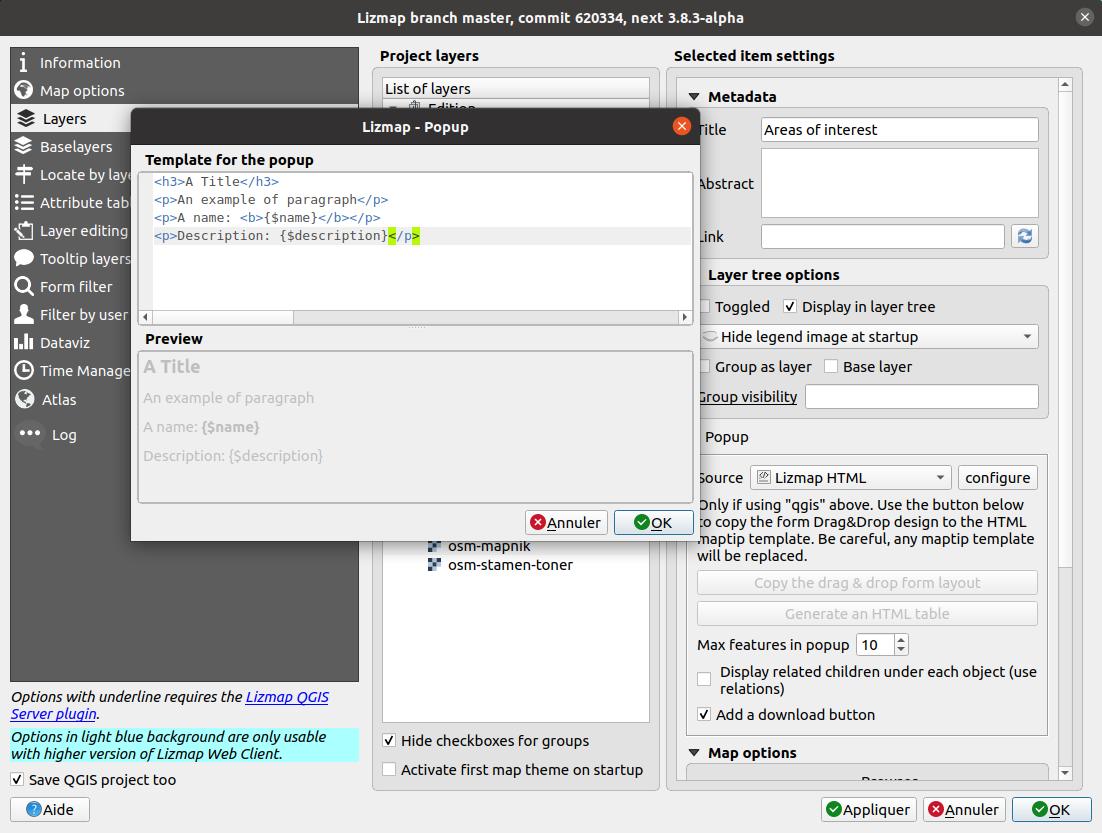
You can edit the popup template with the button Configure in the Lizmap plugin. Clicking on it you’ll get a window with two text areas:
an area where you can type your text
a read-only area, showing a preview of your template

You can type simple text, but we suggest to write in HTML format to give proper formatting. For instance, you can add paragraphs, headings, etc.:
<h3>A Title</h3>
<p>An example of paragraph</p>
The behaviour is as follows:
if the content of the two areas is empty, a simple table will be shown in the popup (default template)
if the content is not empty, its content will be used as a template for the popup
Lizmap Web Client will replace automatically a variable, identified by the name of a field, with its content. To add the content of a column to a popup, you should use the name of the column precede by a dollar sign ($), all surrounded by curly brackets ({}). For instance:
<h3>A Title</h3>
<p>An example of paragraph</p>
<p>A name: <b>{$name}</b></p>
<p>Description: {$description}</p>
Muista
If you have configured an alias for a field, you have to use the alias instead of the name, between the brackets.
You can also use the values of the columns as parameters to give styling to the text. An example here, to use the colour of a bus line as a background colour:
<p style="background-color:{$color}">
<b>LINE</b> : {$ref} - {$name}
<p/>
Usage of media and external links
You can use the media referred to in the table content, even if you use a template model. To do this, you should use the media column, taking into account the fact that Lizmap Web Client automatically replaces the relative path of the type /media/myfile.jpg with the full URL to the file, accessible through the web interface.
You can also use full URLs pointing to the pages or images on another server.
Here an example of a template handling media and an external link:
 <p style="font-size:0.8em;">A Title</p>
 <p>The name is {$name}</p>
<p>
   A sample image<br/>
   <img src="{$image_column}" style="">
 </p>

 <p><a href="{$website}" target="_blank">Web link</a></p>

 <p><img src="https://www.3liz.com/images/logo-lizmap.png"/></p>
Katso myös
Chapter Media for more details on the use of documents in the directory media.
Form popup
If you have defined a form layout with the Drag and drop form designer for a layer in , you can also display it in its popup. See the QGIS documentation about Drag and Drop form.
The QGIS Form, designed for HTML, is displayed in the popup directly. You can’t alter the popup on runtime.
Tabs defined in the Form Layout in QGIS will also be displayed as HTML tabs in the popup.
If you want to alter the popup HTML, then you must use QGIS Popup instead of Form Popup.
QGIS popup
QGIS popups can be configured via . The main advantages of this approach are:
HTML is used
you can use QGIS variables and expressions, thus adding information created dynamically
the popup can be previewed in QGIS, using map tips. You can enable map tips in the menu
the popup configurations are stored in QGIS project and layer style, so they can be reused in other Lizmap projects without replicating the configuration.
Similar to Form popup, you have a Drag and drop form designer for a layer, you can click on the Copy the drag and drop designer button. This will erase any existing maptip set on the layer and will generate the QGIS Expression matching the form layout.
To have a similar popup as the auto one, you need to click the button in the Lizmap plugin .
To display some color with HTML according to the value of a field, you can use this QGIS expression above :
<p style="color:[% if("POPULATION" > 5000, 'red', 'black') %]">[% POPULATION %]</p>
Link to a PDF QGIS layout
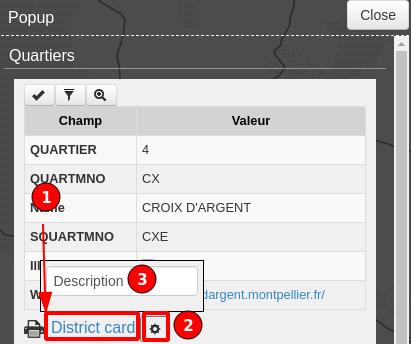
Every feature of a layer with an atlas configured will have a link (1) at the end of its popup which open a PDF for this specific feature, using the QGIS Atlas layout. If the layout contains custom text fields, a button (2) will be displayed. Clicking this button, allows you to type values for those custom text fields before printing. To enable this feature, you need a QGIS Layout with atlas enabled on that layer and to download the AtlasPrint QGIS Server plugin on GitHub : https://github.com/3liz/qgis-atlasprint

One to many relations
It is possible to display multiple objects (photos, documents) for each geographical feature. To do so, you have to configure both the QGIS project and the Lizmap config.
In QGIS project:
Use 2 separate layers to store the main features and the pictures. For example trees and tree_pictures. The child layer must contain a field referencing the parent layer id.
Configure aliases and field types in . Use Photo for the field which will contains the relative path to pictures.
Add a relation in QGIS project properties between the main layer trees and the child layer tree_pictures in .
Add data to the layers. You should use relative path to store the pictures path. Theses paths must refer to a project media subdirectory, for example: media/photos/feature_1_a.jpg
In Lizmap plugin:
In the Layers tab, activate popup for both layers. You can configure source of the popup if you need specific layouts
For the parent layer, activate the option Display relative children under each object (use relations)
Optionally, add the two layers in the Attribute table tab
Optionally, you can activate editing for the two layers, to allow the web users to create new features and upload pictures
Save and publish your project and Lizmap configuration
In Lizmap Web Client:

If relative children popup are defined as auto, this button will be visible in the feature’s popup at the top of related objects.
Click it to compact all related objects in one table with search, sort and paging capabilities.
Display children in a compact way
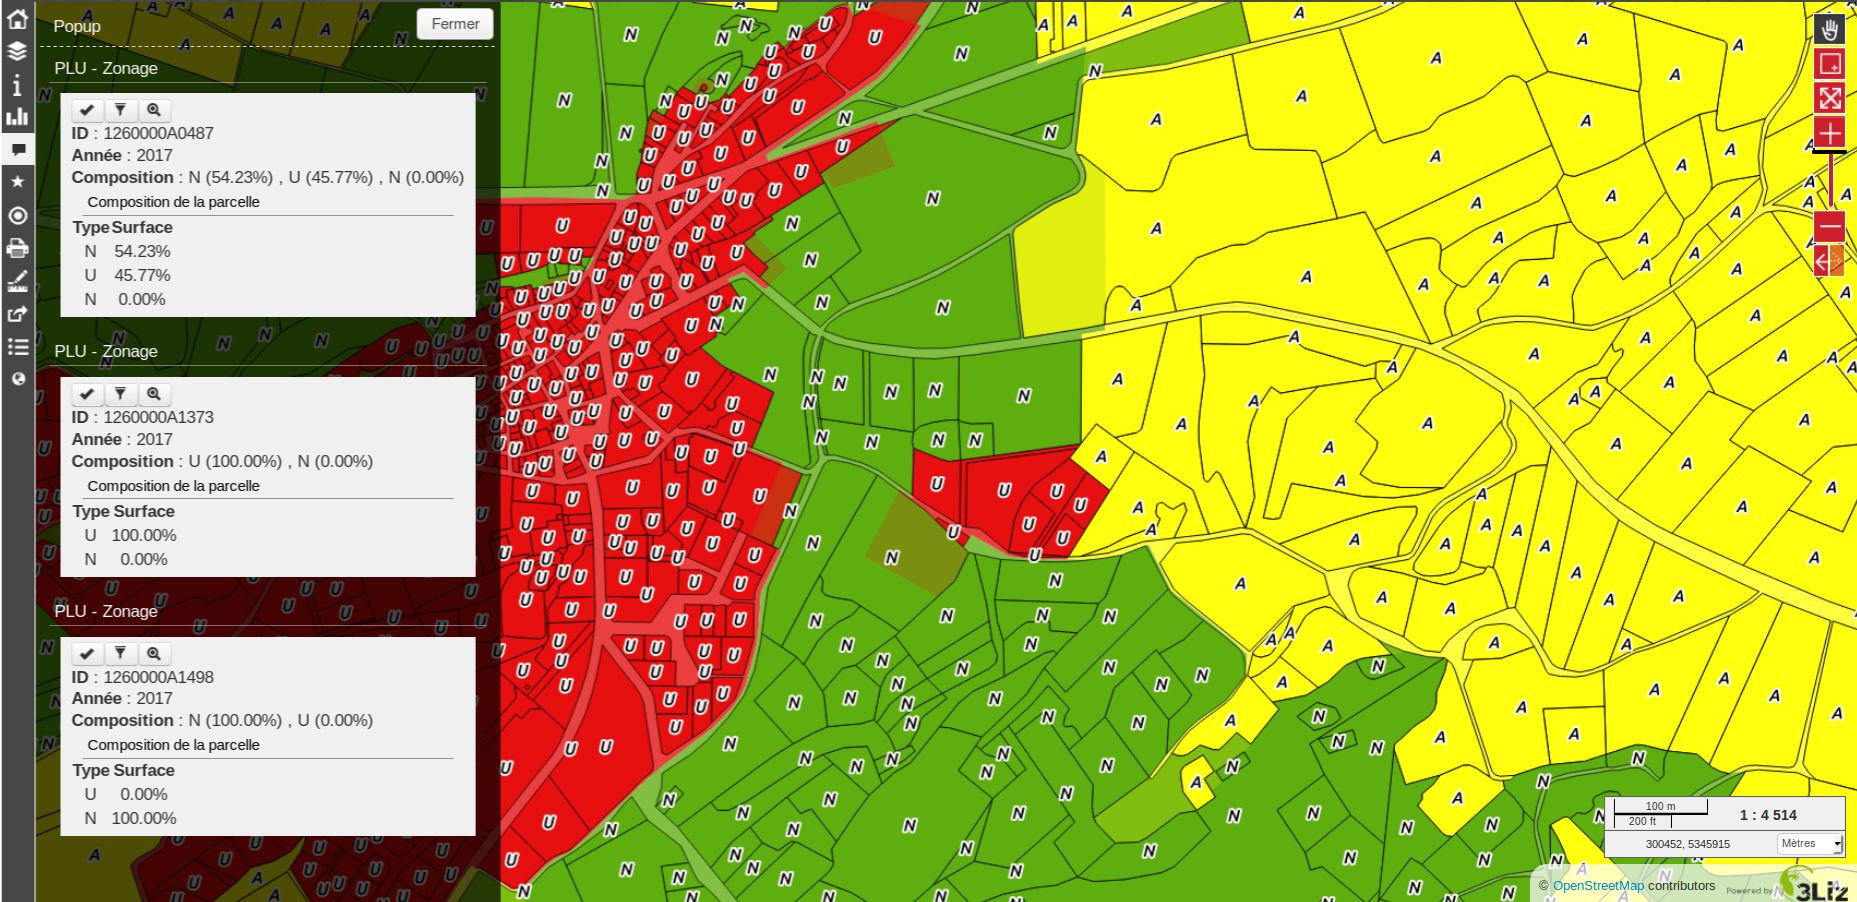
You can change the way children are displayed and make them look like a table. For that, you will need to adapt the HTML of your children layer and use a few classes to manipulate it.
”lizmap_merged” : You need to attribute this class to your table
lizmapPopupHeader : If you want to have a better display of your headers, you will need to put this class in the ’<tr>’ who contains them
lizmapPopupHidden : This class permit you to hide some elements of your children that you want to hide when there are used as a child but you still want to see them if you display their popup as a main Popup
Here an example:
<table class="lizmap_merged">
 <tr class="lizmapPopupHeader">
     <th class="lizmapPopupHidden"><center> Idu </center></th>
     <th> <center> Type </center> </th>
     <th> <center> Surface</center> </th>
  </tr>
  <tr>
     <td class="lizmapPopupHidden"><center>[% "idu" %]</center></td>
     <td><center>[% "typezone" %]</center></td>
     <td><center>[% "surface" %]</center></td>
  </tr>
</table>

